|
|
My good friend and cycling buddy, Travis, really, really cares about his cycling experience and he is serious about it. He only buys excellent quality equipment with rave reviews. His touring bicycle is equipped with a Tubus rear rack ($90) and a pair of Ortlieb panniers ($150). That equipment is probably going to last him a lifetime and is never going to fail under a cross-country tour. He says that the rack comes with a warranty that states that if it ever breaks, the Tubus company will send someone to where ever god forsaken place you are in the country and replace it for you. Wow, that must be a really good rack.
But we aren’t going to talk about Travis’ gear today. We’re going to talk about racks and panniers that aren’t going to cost you an arm and a leg, and that are sufficient for weekend get-aways, commuting around town, and other more common cycling activities. These are the kinds of racks and panniers that I buy, and for the past 3 years they have held up very well and work fine.
I have bought about 4 different rear racks during the last 3 years, and the racks certainly vary in hardware style and quality. The sturdiest rack I own is a Bor Yueh rack from Nashbar.com (it still appears to be listed in their rack section if you want to take a look at it). Surprisingly this rack is only $15.99. The only thing I don’t like about it is that it is hard to attach the bottom hooks of my Avenir Metro Pannier to it due to the shape of it’s “legs”. However, you can still jamb the hooks onto a section of the legs of the rack and make it work. It’s just hard getting the panniers off and on.
 Topeak Explorer Rack The best advice I can give you is to look for racks with thick-looking tubing and preferably with 3-tube leg support, similar to the rack to the left. You can also read reviews, compare rack descriptions, and so on. The rack you see on the left, by the way, is the Topeak Explorer Bike Rack and is about $28. I have never used this rack, but it looks pretty good. Also, the Avenir pannier I refered to earlier would fit well on this rack since its bottom hooks would fit perfectly under those little flared bits at the bottom of the legs of this rack. Most racks and panniers work fairly well together, but it’s nice to pick a pannier and rack that are as well matched as possible. A pannier that fits well on a rack and is easy to take off and put on makes your life that much easier. :-)
Whether or not you even need panniers depends on what you’re going to be carrying around. Are you going to go grocery shopping for a lot of little things? You might want to use panniers. Are you going on a beer run for a 30-can case of Hamm’s? All you need is your rack and some short bungee cords (I do this all the time, by the way)!
 Avenir Metro Panniers I have only bought one set of panniers in my 3 year cycling career and they have worked out pretty well. The Avenir Metro Panniers have 2,165 cubic inches of cargo space, 1 large top pocket, 2 medium side pockets, and 2 small side pockets. I’ve been using this rack a lot over the past two years and I’m really surprised none of the zippers have failed yet. I was sure one of them would break by now, seeing that I bought these panniers for only $40. But, by heck, they have held up fine. Also, if you need to strap that case of beer to the top of your rack, you can leave that big top pocket empty and it just lays flat. And the large side pockets fit 6-packs perfectly, almost as though that is what they had in mind when they designed these panniers. :-)
Yes, cycling and buying beer go together well and should be an important consideration in your cycling equipment decisions! You have been warned!
I recently received an invitation from the Bannock Transportation Planning Organization to attend an open house to discuss needs and strategies to address problems with our streets and highways, how these problems effect cyclists and pedestrians, and problems with our transit system. I won’t be able to attend the open house due to prior commitments, however I would really like to contribute my thoughts to this extremely worthy cause. So, I’m writing my thoughts here on my blog! Feel free to link or post this article anywhere you deem appropriate.
My Perspective
Just so you know where I’m coming from when I write this, I’ll give you some basic information about myself. I am 30 years old, I live on the east side of town with my wife and 2 children (a 3 year old and a newborn), my job is 2 miles away from my home, and I work in the Information Technology field. I’m a home owner, and I own 1 car and 4 bicycles. I very seldom drive to work because my wife usually needs the car to run errands, take the children to activities, etc. Additionally, I would really like to use my personal savings for other things besides buying another vehicle. Along with these logistic and financial reasons, here is a description of my reasons for my transportation choices.
Reasons I Ride My Bike And Take The Bus
Have you ever stood on the corner of an intersection at rush hour and watched everyone driving by? Stop and go traffic, engines heating up, exhaust filling the air, tempers flaring, inattentive drivers on cellphones. People get from place to place hauling 4,000 pounds of metal along with them just so they can sit in a sofa-like seat while doing it, and so that they can get to where ever they need to go in the shortest amount of time. There has got to be a better way to get a few miles across town than this. I really think a single occupant in a motorized vehicle is a pretty danged inefficient method of doing this. With some strategy applied to this need for short-distance travel, we should be able to save a lot of money and make the air cleaner, wouldn’t you say?
By choosing to ride my bike and take the bus, I have saved a lot of money that would otherwise been spent on another car, more vehicle maintenance, more gasoline, more insurance, and so on. I have also stayed in good physical shape and discovered a love for cycling. Because of my cycling, I have a good chance of avoiding common heart and metabolism illnesses that appear to be becoming increasingly more common nowadays. Also, cycling to work is a stress reliever, while driving to work only adds stress to your day (unless you listen to soothing New Age music on the way, or something). :-)
Reasons People Don’t Ride Their Bike Nor Take The Bus
Most people automatically assume that driving a vehicle all by themselves around town is the most convenient and quickest way to get to their destination. They don’t have to consider the transportation needs of any other occupants of their vehicle (since they’re all by themselves), and they can accelerate up to the speed limit as quickly as possible in order to get where they are going in the most time-efficient manner. Why would anyone use any other kind of transportation? Single occupant motorized vehicles are surely the best of all transportation types.
Pocatello and Chubbuck together only cover about 5 miles east to west (at its widest point) and 6 miles north to south. And there’s a ton of intersections with stop signs and traffic lights in between. It would be efficient to be able to cruise 30 miles per hour without stopping from point A to point B. But, that isn’t possible. With all the stops and slowing down you have to do in town, the best you can hope for is maybe a 20 mile per hour average. You aren’t going to do much better than that unless you are flooring it away from every stop sign, and then you’d be wasting a lot of gasoline.
By bicycle, you can easily average 10 miles per hour in any journey across town, even if you aren’t in the greatest shape. According to Idaho code, cyclists may treat stop signs as yield signs, and red lights as stop signs. Many times, this law allows a cyclist to look around for traffic while still moving, and pedal right on through a stop sign. It’s perfectly legal. I commute by bicycle on the residential back roads, and I’m usually the only one at most intersections.
So, really, the only reason people are driving motorized vehicles is to get that extra 10 miles per hour of speed? You’ve got to be joking.
Ok, sorry, I’ve gotten off on a tangent there.
A lot of people don’t ride their bikes for transportation because they don’t like to be sweaty, they are afraid of getting hit by a car, they are unsure of their cycling skills, and they don’t know what to do if it gets too dark, too cold, or too hot. I think that about covers it.
People don’t ride the bus because they assume it’s not going to fit their busy, hectic schedule. They want the freedom to be able to drop their daughter off at soccer practice in the morning, run a few errands at lunchtime, and pick up a loaf of bread after work on the way home. Sorry, but trying to fit all that into a bus schedule would be a serious, and probably futile, endeavor.
So, What’s Wrong With Our Transportation Infrastructure?
Nothing. It’s just fine for Pocatello and Chubbuck. I’ve been using my bicycle and the bus for 3 years now, and I have no complaints. Sure, that’s easy for me to say. My life isn’t terribly hectic, and I live only a couple of miles from the middle of town. Then again, I would wager that at least 60% of the population of Pocatello and Chubbuck has a similar life as mine (in terms of busy-ness) and live approximately 2 miles from the center of town or less. Remember, this town is only 5 miles by 6 miles.
So, What’s The Solution, Mr. Bike-And-Bus Guy!?
There’s 2 really good ways of selling any idea.
Simple and accessible education (otherwise known as good marketing strategies). People don’t know if commuting by bicycle and by bus is right for them or if they’re going to like it. Well, show them what to do. Show them what bicycles to buy, what cycling clothing to wear, what bicycle accessories they’ll need to make their bicycle commuting experience as comfortable and enjoyable as possible! Make it SIMPLE and EASY or people aren’t going to do it. The auto industry has made using cars ridiculously easy (at a big price, but who cares, right?) and that’s why everyone is doing it. We can do the same thing with bicycles with some strategy and effort. People don’t know if taking the bus is going to meet their needs on a given day. Well, why isn’t there a nice little online web application where they enter in all the points they’d like to go today, and the web application spits out a bus schedule for them? Wow, that would make taking the bus SIMPLE and EASY, wouldn’t it? People also need to be educated on the idea of lowering the number of trips they have to make around town. Buying a few loaves of bread on the weekend saves more time and effort that buying one loaf of bread several times a week.
Show them their return on investment, and remind them of it every now and then. No one does anything without reaping a decent benefit. And they aren’t going to do it in the first place if there’s too much risk involved, no matter what the benefits are. With cycling, people need to learn how to cycle safely and how to buy bicycles and accessories that aren’t going to cost them as much as the car they bought last year. People need to be sold on the health and environment benefits of cycling. People need to be reminded of the money they’ll save and pollution they’ll reduce by taking the bus.
So, How Should BTPO Invest Its Time And Money?
In my opinion, the best way for the Bannock Transportation Planning Organization to spend their money and time in the next few decades is to get that 60% of eligible citizens I mentioned previously to ride their bike and/or take the bus at least a few times a week. And they should do it by creating a variety of tools that educate the masses and show them the return on investment of commuting by bicycle and bus. We know that doing these things is good for the people and good for the community, now all we need to do is help the people understand how and why.
In closing, I would like to say that so far the BTPO is doing a really good job of increasing community awareness about alternative transportation and I truly applaud you for it! Keep up the good work, you are going in the right direction!
Sincerely,
Korey Pelton
 Bicycle commuter anatomy Portneuf Valley Bike To Work Month is during the month of May! Wooo! Time to get into shape, save some money, and breath some cleaner air! Let’s do it!
I have written this article to give a few tips to those of you who are brand new to commuting around town by bicycle. At first, you may be apprehensive about cruising around Pocatello on a bicycle, but after you’ve done it for a month or so you’ll wonder why you haven’t been doing it all along. In my 3 years of commuting by bicycle, I have observed that Pocatello is one of the safest places to ride a bike in the nation. Motorists in this city are some of the most courteous I’ve seen anywhere, and most of them are happy and inspired to see citizens who are using an alternative form of transportation.
The image to the left shows a few items that can make your commute more comfortable, but you don’t need them all. I drew this image as mostly a humorous addition to this article (the cyclist is my buddy, Travis). Wear whatever works for you.
The following is a list of best practices that have worked for me. But, as I have said, everyone has different preferences for their cycling style, so be sure to take a few weekends to get to know your bike and ride a few miles before you set out on your Monday morning commute!
Safety First!
One of the best resources for learning how to cycle in an urban environment is the booklet known as Bicycling Street Smarts. You can read it online at bikexprt.com, you can order a free copy from the Idaho Transportation Department, or I believe you can even pick up a copy at Scott’s Ski and Sports. I highly encourage you to read it, and then practice what you have read. At first, some of the concepts in the book may seem strange to you (what, you want me to ride in the lane?!), but after you get out on the road, the reasons will become clear to you.
Also, make sure you have a good idea of what the best cycling route to work is, and take some time to bike it to see if it works for you. I would not suggest riding on a high traffic road with no shoulder, such as Yellowstone Avenue! It is much safer and more enjoyable to use low traffic residential streets for the majority of your commute. A friend of mine (thanks Hans!) reminded me of the new, nifty cycling tool on Google Maps! Type something like “123 Something Street Pocatello to XYZ Company Pocatello” into the search box, click “Search Maps”, select “Bicycling” from the drop-down menu at the left, and click “Get Directions”. This will show a cycling-friendly route on the map connecting the two points!
What Should I Wear?
I have to wear professional clothing for my job (button up shirt, sometimes a tie, dress pants, and dress shoes). Does this stop me from enjoying my morning ride to work? Heck no! Here’s how I do it:
- Don’t overdress. Even if it is 30 degrees in the morning, the only thing you need on your torso is your shirt and a windbreaker. If you wear anything more than that, you’ll arrive at work all sweaty. If you are particularly susceptible to cold, though, you can wear an extra layer. Then, if you overheat, you can always take a layer off and throw it in your pannier or backpack.
- Wear a helmet. Not only does a helmet give protection from any head injuries, but it also catches the attention of motorists.
- If it is below 50 degrees, I recommend wearing a thermal beanie under your helmet. I get brain-freeze if I don’t do that (then again, I also don’t have any hair), and that is no fun.
- Pick up a couple of Velcro leg bands at one of the above mentioned places. You can get them for like $2 at Scott’s or Barrie’s in Pocatello. They will keep your pants from catching on your bicycle chain rings. Oh, and if your shoes have long laces, tie them in 4 or 5 knots so they are up and out of the way. It sucks to be cycling along, having a great time and then having your gears eat your laces.
- Carrying your lunch to work in your backpack is simple and easy. But, to avoid a sweaty back, I recommend a rear rack and a pannier. You can get a rear rack from the above mentioned stores for usually about $15, and you can get low cost pannier or set of panniers for around $30 if you shop around. That way, your back stays dry and you keep weight off of your lower back and crotch!
Those are the things that many beginning cyclists tend to forget. I’m sure you can fill in the rest of the clothing related details. :-)
My Bike Is A Mess! What Shall I Do?
Most local bicycle shops can service your bike and get it running great for $30 or less. If you’d like to give it a try yourself, here is a few very common maintenance items.
- Turn your bicycle upside down, spray some orange degreaser into a rag, and run your chain through the rag until most of the dirt is gone. Then dribble some general purpose oil (NOT WD-40!!!!!) along the chain and wipe the excess oil off with a rag.
- Get a pump with a built-in air pressure gauge and air your tires up to the PSI specified on the tire’s sidewall. Inspect your tire for wear and any hissing noises. If you’ve got a leak in your tube, search google.com for bicycle tube repair. There’s about a million pages online on how to do this!
- Ensure your brake pads are making adequate contact with your wheel rims and are in-line with your rims when you squeeze your brake levers. Ensure that they aren’t touching your rims when you aren’t squeezing your brake levers.
Those are about the 3 most important things. There is really a ton of Youtube.com videos and online tutorials on how to solve any bicycle problem imaginable. Bicycle repair and maintenance is actually pretty simple and is kind of relaxing and enjoyable. Now, go get that bike out of your garage and give it some love and attention!
How Can I Get Involved With This Bike To Work Month Thing?!
You can get involved in 1 of 2 ways!
- If someone in your work group or company has already volunteered to be the leader for your Employee Challenge team, I’m sure they will be contacting you soon! Take this as an opportunity to give bicycle commuting a try!
- Want to participate, but you’re the only one in your company who is interested? Become an Employee Challenge leader! It’s easy! Just be sure to get your supervisor’s permission first, though, before you start mass emailing your co-workers about this event. :-)
Good luck and I’ll see you out on the road!
 Schwalbe Marathon Winter bicycle tire A few weeks ago, Pocatello, Idaho experienced a fairly heavy snowfall of about 6 inches or so. This was followed by temperatures ranging from -10 F to 15 F for several days after. None of the snow melted for an entire week, which made all the roads turn into snowy chocolate mousse (see this icebike.org page for a better description of this). I had recently purchased some better studded snow tires for my mountain bike in an attempt to improve my winter cycling experience. However, this turned out to be only one part of the formula for making it from point A to point B on snowy roads. The other part of the formula being practice, practice, practice. :-)
The Monday morning after the heavy snowfall weekend, I set out on my mountain bike shod with studded tires. Wobbling and slipping around in the thick, partially-packed snow for a few feet made me quickly re-think my decision. I wussed out, put my bike away, and began sweeping the snow off my car, feeling defeated.
The next few days of that week were terribly cold with morning temperatures regularly hovering around -10 F. After looking at the bus routes on the Pocatello Regional Transit web site, I found that there was a very convenient route within 5 minutes walking distance of both my house and my workplace. So I rode the bus the rest of the week. Driving your car to work is just wasteful, inconvenient, and bad for the environment. It’s also expensive if you work for Idaho State University, which charges employees a hefty fee for parking. :-(
 Merrily Cycling Through The Snow! A week later, temperatures were back up to normal levels, and so my buddy, Travis, and I decided to practice our winter cycling around town that weekend. Travis is a lot more confident riding on snow and ice than I am, so I was really interested in taking note of his techniques. I was secretly hoping to see him wipe out, which might make me feel less like a goof. :-) Cycling to Travis’ house by myself was a bit nerve wracking, but after a while I was getting the hang of it. Travis joined me at his place and we headed out to Sacajawea Park near the West Bench area of Pocatello. This park trail had plenty of snow on it in several places which proved to be a pretty big challenge. This ride, and Travis’ coaching, taught me several things about bicycling on snow:
- You aren’t going to wipe out unless you do something stupid like turning sharply. Your body automatically corrects your balance as you slip around on uneven snow, chocolate mousse, etc.
- Cycling in fresh snow is a piece of cake. It is much easier than riding on trodden snow, which is the tricky part.
- Keep your gear low and spin. Take your time, there’s no rush.
- Keep your hand off the front brake. Use your rear brake, especially while descending a hill. Your front wheel needs to remain moving and as straight as possible.
- Schwalbe Marathon Winter tires are worth the $60/tire. They bite into ice better than cheaper tires and they will last for several winters, whereas the studs on cheaper tires get very dull after only one winter.
After about 15 miles of riding around town in all kinds of different consistencies of snow, I was actually feeling good about riding in snow and enjoying myself. The next Monday, I got up, hopped on my bike, and cycled through the chocolate mousse with glee! I actually purposely plowed through some thicker snow just to put a little excitement into my ride since, by then, there was plenty of bare pavement to ride on.
Winter cycling isn’t for everyone. But if you’re looking for an alternate winter transportation method and some serious fun, buy a good pair of studded snow tires, get out there and give it a shot! But, beware, it really does take some practice to get over your initial nerves, or at least it did for me! It’s a lot like learning how to swim for the first time. But after you get past your fears, you gain a lot of confidence and you get a feel for it. Several sources online claim that winter cycling improves your overall cycling stability and confidence on all kinds of terrain, and I can definitely see the truth in this.
Here are some useful and interesting winter cycling links!
 Korey the cyclocross fan. Ok, I’ve never competed in cyclocross, but I love watching cyclocross, so that counts for something! And yesterday I did some off-road hill-climbing, maneuvering tricky descents, and riding through mud and snow -laden trails on my touring bike. Ok, I never had to dismount and carry my bike, but I think this ride was adequately cyclocrossish and it was a great workout. Additionally, I found the correct path between Trail Creek Road and Michaud Creek Road, whereas I failed before!
The forecast for Thanksgiving in Pocatello sounded awesome: 45 degrees and lots of sun! This was the perfect time to reattempt the route I had planned; namely going from Trail Creek to Michaud Creek road rather than the other way around. I was bound and determined to find the correct trail this time! Due to the recent snow and ice on the roads, I had put my studded snow tires on my mountain bike, so my trusty touring bike was my only option today. It really wasn’t a bad choice since this route requires about 50% on-road riding.
 Near the top of Trail Creek Road. This route begins at the bottom of Trail Creek Road on the southwest end of Pocatello (commonly referred to as the West Bench area). The steady climb up this road is a great warm-up. The pavement ends after a few miles and you’re on a well maintained trail after crossing a cattle guard. It was at this point that I had to take my gloves and windbreaker off since I was roasting to death after this long climb! And then the climbing just goes on and on until you can see most of Pocatello in the distance behind you. The sun was so brilliant, the wind was still, and I could feel the warmth of the suns rays and hear the distant sound of shots fired from people practicing for hunting season. Aaah, Pocatello is a rather nice place.
Soon, I was at the top and I recognized the trail intersection here from what I had seen on mapmyride.com. After some looking around, I found the trail that must be the path to Michaud Creek Road; it was on the other side of the ridge and didn’t look like much at first since it was less maintained and skinnier than the other trails. And this is where the sloppy cyclocrossing fun began! This trail was cut rather deeply into the hill, so it was plenty snowy and muddy. After a few near-spills, I got the hang of where to put my front tire to keep from slipping out. It was quite fun practicing this slippery decent in such nice weather with no traffic around! I highly recommend it!
 View from the south side. The decent on the south side of the ridge is very gradual, with fields of tall grass, junipers, and sage brush all around you. In the distance, you can see the Arbon Valley and the American Falls Reservoir. My tires were soon coated in thick mud and I was glad for my fenders. I came upon a BLM Trail Management sign and a gate, and carried my bike around the gate. Oh, hey, I guess I did have to carry my bike! I wouldn’t recommend running around the gate with your bike, however, since it was rather hard to get through and there was a cattle guard you had to walk across on the other side of the sign. Cattle guards are very slippery when your shoes are wet, so be careful :-)
 Wheee! After a few more miles, the trail ended at Michaud Creek Road. On this end of the trail, there is an ancient-looking, rusty no-trespassing sign, but I really don’t think it has been applicable for a few decades since this was the only no-trespassing sign I saw on the entire journey and there was a BLM information map a few miles back. Trespassing shmespassing!
I think I will try this route again from the other way on my mountain bike in the spring!

The above map shows my intended route for my Saturday afternoon ride. However, I went too far up Michaud Creek Road and ended up performing a hike-a-bike over a very craggy, rock-strewn, god forsaken mountain top trail, then trail riding down City Creek trail (runs parallel to Trail Creek Road about a mile or so to the east). Yeah, I didn’t see that coming.
The ride started along the Frontage Road highway towards American Falls. I had never cycled on Michaud Creek Road, so I was riding my touring bike in case I had to do some unimproved road riding. Later in this story, you will see that this was the understatement of the week. I turned left onto an unmarked road that I assumed was Michaud Creek Road since it was right where it was supposed to be (just east of the Pocatello Airport). I keep looking for a road sign on the way up the road but never saw one. It turned out to be a pretty nice road. It was scenic, I saw 3 pheasants, and the road is sheltered on both sides by hills, so Pocatello and the Simplot factory disappears from sight. You also can’t smell Simplot from Michaud since the wind blows from the west!
I cycled past some cows that were wandering loose at the side of the road and after quite a few miles of constant uphill cycling I started to wonder when the heck this road would turn to dirt; but it just kept on going. Eventually the road turned north and the pavement started looked pretty old and weathered, and the grade increased too. Then I was in my lowest gear and crawling up the steep grade. The mountains near Kinport peak looked quite close and the surrounding hills looked very familiar to me as those I’ve seen around the City Creek area, so I knew I was nearing the top. Also, the wind is blocked in the Michaud Creek Valley, but now that I was above the valley I was feeling the cold October wind.
Finally the pavement ended at the top of the ridge and I saw a small pond nearby, which was quite a surprise. It must be a low point between the mountains where run-off collects. I got off my bike like an old man with arthritis and walked up to the highest nearby point to take a look around. I tried to get an idea as to where I was. I could see the blinking towers on top of Howard Mountain. Kinport peak was blocked from view by some foot hills. I could see Holt Arena directly to the North. I must have been very close to Trail Creek Road, but I could not see any clearly defined trail. I walked up another hill to take a better look, but I could only guess the direction I should be going. My better judgement told me just to go back from where I came, especially since it was downhill all the way back to Frontage Road, and then the west wind would blow me back to Pocatello. But my adventurous side won the battle and I began hiking my bike up the most likely looking trail. As soon as the trail leveled out a little, I hopped on my bike and rode a ways. Then I hopped back off, cursed the rugged, rocky, steep trail and hiked some more. I kept reminding myself of the past experiences I’ve had that told me what a glutton for punishment I must be. Had I been riding my mountain bike instead of my touring bike, I might have rode more and hiked less. But, really, I’m kind of a wuss when it comes to traversing rocky, steep, technical trails. I’m an explorer, not an adrenaline junkie.
Finally, the trail turned a lot easier so I hopped on my bike and made some time. The trail eventually turned onto City Creek trail to my utmost glee. I was so happy to see a trail that was familiar to me. I met a hiker and another guy driving up in his truck. I hadn’t been away from civilization very long, but I was really happy to see another human being after being alone and lost for the past hour or so. Riding down the trail on my touring bike wasn’t very fun. No shocks, no upright position, and cantilever brakes that required me to grip them as hard as I could to get any stopping power. Yeah, I’ve read before that the mountain bike brake lever position and V-brakes were designed with stopping power in mind and I have personally discovered that to be the truth. You can get better stopping power with cantilever brakes if your hands are in the drops, but you don’t want your hands in the drops when your descending a bumpy trail. Yeah, remember folks, for best results, use a mountain bike for mountain biking. Just a tip :-)
I got home about 3.5 hours after I started my journey, and I drank plenty of beer to ease my frazzled nerves, my sore hands, and several other overly used muscles groups. Next time I will probably cycle up Trail Creek Road and see the situation from a different angle. I’m anxious to figure out where I went astray.
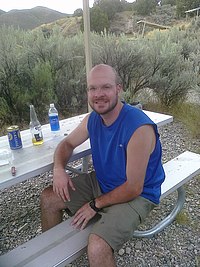 Relaxing at Hawkins Camp Ground On August 29, 2009, my long-time cycle camping buddy, Travis, and I set out for Hawkins Reservoir (40 miles away from Pocatello) to do an overnight cycle camp. We’d never camped at Hawkins Reservoir before, but with a bit of looking around online, we discovered that it did have camping areas and restroom facilities, but no running water. McCammon was 15 miles away from our destination, so we would load up on food, beer, and water there before continuing on to Hawkins.
Please note that I am writing this article on October 7, 2015, because I was lazy and am finally getting around to it. So this article is going to be overly brief, which some of you may appreciate. Anyway, we cycled to McCammon, loaded up on supplies at the local Flying J gas station, and headed out to Hawkins. It was at this point that I remember the temperature approaching 95 F. A portion of the route we chose (Arimo Road -> Hawkins Road) was gravel, which made the going even more slow and difficult. I remember drinking a lot of my water supply during the very hot ride to Hawkins, which worried me. But I knew we’d probably be fine since we’d cycle back to McCammon in the cool of the next morning.
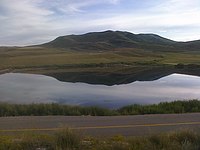 Hawkins Reservoir in the evening We arrived at the camping area which was right across the road from the reservoir, and set up our tents. We noticed there were a few other tent campers and some RVs around, so we could beg for water if need be. We explored around the reservoir a bit, and drank some of our warm beer, which was less than satisfying. Next, we met a friendly, older couple who had fished that day and offered us some water and cold beer, after expressing their awe at us cycling there from Pocatello. We traded some of our warm cans of beer for some cold ones, and chatted with them a bit. They told us the bizarre news about one of the tent camp sites being some young adults from Downey who had been thrown out of their home by disgruntled family members and were actually living there for a while. The couple offered us some fresh, grilled trout which we gratefully accepted. We ate, chatted some more, and then retired to our tents.
We rose at dawn, packed up, and prepared to head to McCammon. The campground friends told us that it was faster to go to McCammon via Garden Creek Road, through the gap. It was a change in scenery from the way we had came, and we wanted to avoid the gravel. It turned out to be a very beautiful and thrilling route. The downhill grade combined with cycling through the narrow, winding gap of vertical rock walls on both sides of the road was an amazing experience. I had ridden in my parents’ car through Garden Gap many years ago, but it does not compare at all to cycling through it! In McCammon, we drank hot coffee and ate breakfast sandwiches at the Flying J at an outside patio table. A hot breakfast is always pretty fantastic after tent camping. And then we set out for the remaining 25 miles home.
 Want a body like mine? Yes you do (ok, maybe)! What’s my secret? Eating a sensible diet (most of the time), eating junk food occasionally, drinking loads of beer, and cycling to work everyday! :-) Just look at that sculpted arm from years of lifting heavy mugs of beer! Just look at that not-too-big beer gut! Look at those cyclist legs! This is the diet breakthrough of the century, folks. Want a body like mine? Yes you do (ok, maybe)! What’s my secret? Eating a sensible diet (most of the time), eating junk food occasionally, drinking loads of beer, and cycling to work everyday! :-) Just look at that sculpted arm from years of lifting heavy mugs of beer! Just look at that not-too-big beer gut! Look at those cyclist legs! This is the diet breakthrough of the century, folks.
But, anyway, on to today’s story. I didn’t have time to bring lunch to work today, so I took glee in the opportunity to cycle on over to a nearby McDonald’s and get a few McDouble Cheeseburgers and McChicken Sandwiches! Mmm! Having McDonald’s too often would get pretty boring, but once every few weeks is a treat.
After riding into the parking lot, I noticed they had placed a bright yellow bike rack on the sidewalk. Wow, I guess they got tired of me and the other cyclists chaining our bikes to the kiddie playground fence! I was elated! It’s also a very nice bike rack that holds your front wheel and makes it easy to fasten both your front wheel and frame to the rack. Way to go McDonald’s!
I walked in and got a slight grin from the girl at the counter who tried to hide her expression as she looked at my Velcro straps around my pant legs. Ok, I guess I did look a little geeky with my plaid button-up shirt and dress pants with straps. Ah, well, cyclists do their thing and we don’t care how we look, mmkay? ;-)
After taking my order, I said, “Wow, it’s nice that you guys put a bike rack outside, I’m lovin’ it!” Then I quickly grimaced in pain and said, “Umm, sorry I said that. I hate that slogan. Gah.” They snickered and handed me my order.
Do you want to be a hardcore bicycle commuter? Do you want the ability to cycle to work in comfort no matter what the weather is like outside? This can be quite a tough challenge to meet, but with the right equipment and clothing, it can be done, and all for under $100 bucks (assuming you have a touring, commuter, or mountain bike already)!
Here is the equipment and clothing list that I’ve used in my 3 years of bicycle commuting experience.
Clothing
- Beanie – This is a thin, thermal layer of synthetic material that fits under your helmet for temperatures below 40 degrees Fahrenheit or so. Without it, you’ll get brain freeze!
- Windbreaker – Cycling generates a lot of body heat. A windbreaker is the only protection you’ll need in temperatures above 10 degrees F and can be bought online for around $20. If you’re wearing a sweater underneath it, you’ll sweat to death, even on most winter days. Be sure and buy a cycling specific windbreaker since they zip up closer around your neck better than the average windbreaker and are tapered so they don’t act like a parachute.
- Rain jacket and pants – This is only necessary on rainy days. They work great, even if you do look silly. The whole outfit can be had for around $25 if you shop around online. I recently got my rain jacket from Nashbar.com for only $9.99 and it works very well at keeping me warm and dry during a shower.
- Pant leg Velcro straps – These wrap around the bottoms of your pant legs and keep them from catching in your drive train or on a water bottle cage. They are $2 a pair.
- Gloves – During cool weather, I use cheap gloves I bought from Wal-Mart ($8). During cold weather, I use more expensive ski gloves I bought from Fred Meyer ($15 on sale).
Bicycle Equipment
- Fenders – Fenders are used so that you don’t get sprayed with water and mud kicked up by your tires. I commute to work in semi-formal clothing, so this is a must. I use some SKS brand mountain bike fenders that I bought online for about $25. If your bicycle doesn’t have eyelet mounts for fenders, you can go to your hardware store and buy p-clamps (sometimes they go by other names) and fasten your fenders to the clamps which go around your fork or seat-stays. The only department I found these in at Lowes was the electrical department. They are used in electrical work for holding wiring to walls or something. They come with rubber strips, which are useful for mounting to skinnier frame tubing.
- Studded tires – These are only necessary if you plan on winter commuting. Ice is really the only surface you can’t cycle on with regular tires. Trust me, I’ve crashed several times attempting to riding on ice with regular tires :-) Studded tires can range anywhere from $35 to $70, so shop around and see what works for your budget. Last year, I used the low-end Innova tires which were about $35 a tire, but I’ve noticed that the steel studs are starting to show some wear after only one season. A friend of mine bought Schwalbe Marathon Winter tires for a bit more money, and they feature carbide studs which last much longer and feel sharper than regular steel studs.
Anyway, there is the list of things that has worked well for me in all kinds of weather. I’ve left out some general equipment, such as racks, baskets, lunch boxes and such, but I hope this list gives you an idea of what you need and why you need it!
 My cycling buddy, tlp, and I were planning to do a ride which hadn’t turned out so well for us two years earlier (see tlp’s blog about it here). But this year, we were in better shape and had more cycling experience, so we felt ready for riding from Pocatello to Lava Hot Springs, Idaho, via Smith Canyon Road. My cycling buddy, tlp, and I were planning to do a ride which hadn’t turned out so well for us two years earlier (see tlp’s blog about it here). But this year, we were in better shape and had more cycling experience, so we felt ready for riding from Pocatello to Lava Hot Springs, Idaho, via Smith Canyon Road.
On Memorial Day Weekend, we loaded our bikes up with camping gear and set out on Highway 91. I was riding my new Windsor Tourist touring bicycle and tlp was riding his trusty Surly Long Haul Trucker. About 10 miles out of town or so, I heard a loud “tink” sound all of the sudden that came from the rear end of my bike. Tlp recognized it as the sound of a broken spoke, since he had suffered from the same problem several times on his Raleigh One-Way fixed gear bicycle. After inspecting the rear wheel spokes, we found that tlp was right. We slowly cycled home silently, depressed about this set back. I had the spoke replaced by a bike shop later that day. At the bike shop, I purchased a universal spoke tool and 3 extra spokes, just in case this happened again miles from home.
 We still had 3 days left of our extended weekend, so we set out again the following day. And this time about 3 miles into our journey, I snapped another spoke. It was on the drive side of the wheel, and so we couldn’t see a way of replacing it since the cog-set was in the way of threading a spoke through the hub. We couldn’t afford to waste another day, so I decided to cycle home, transfer all my gear onto my mountain bike, and head out again. Tlp agreed and we quickly cycled back to my place and made the swap. My mountain bike had some old worn studded tires that I was getting the rest of their usefulness out of, but I didn’t have time to be picky! I inflated the tires up to 70 psi and we set off again! We still had 3 days left of our extended weekend, so we set out again the following day. And this time about 3 miles into our journey, I snapped another spoke. It was on the drive side of the wheel, and so we couldn’t see a way of replacing it since the cog-set was in the way of threading a spoke through the hub. We couldn’t afford to waste another day, so I decided to cycle home, transfer all my gear onto my mountain bike, and head out again. Tlp agreed and we quickly cycled back to my place and made the swap. My mountain bike had some old worn studded tires that I was getting the rest of their usefulness out of, but I didn’t have time to be picky! I inflated the tires up to 70 psi and we set off again!
Cycling on the road all the way to Arimo wasn’t too bad, especially since my tire pressure was so high. It was a nice day with a few clouds passing by and we enjoyed ourselves. As we came to the entrance of Smith Canyon road, we took some snapshots and cycled on. Soon, the road turned to gravel and I shifted down to my granny gear to take it slow and save energy. Memories of this same spot two years earlier were in my mind and I knew I had better take it easy or I might suffer the same exhaustion that I had before. Then again, it was only about 80 degrees at the very worst on this day, and the trip two years earlier had temperatures of over 100 in the sun. I paused every few miles to pour some water onto my Sweat-Vac beanie under my helmet and this made the slow climbing up this trail easier.
 Soon, we encountered an intersection in the road which marked the place where the road became oiled gravel, and this made the cycling easier. Also, clouds had darkened and it began to sprinkle, which was very welcome. The road became an ascending roller coaster ride as we pedalled over the hills, and then it became more uphill. After what seemed a very long time, we apexed the 1800 foot climb and we smiled and laughed as we knew what lay before us. We drank some water and sped down the 1800 foot, 4 mile paved decent into Lava Hot Springs. After a good 10 minutes of going somewhere close to 40 miles per hour downhill, we cycled the rest of the way to Smith’s Trout Haven and setup camp. Soon, we encountered an intersection in the road which marked the place where the road became oiled gravel, and this made the cycling easier. Also, clouds had darkened and it began to sprinkle, which was very welcome. The road became an ascending roller coaster ride as we pedalled over the hills, and then it became more uphill. After what seemed a very long time, we apexed the 1800 foot climb and we smiled and laughed as we knew what lay before us. We drank some water and sped down the 1800 foot, 4 mile paved decent into Lava Hot Springs. After a good 10 minutes of going somewhere close to 40 miles per hour downhill, we cycled the rest of the way to Smith’s Trout Haven and setup camp.
The campground was more like a village of RVs, with a tent here and there. Our nearby neighbor who was living in a camper with his family greeted us while drinking a beer and said, “hope you don’t mind living next to us, we get a little noisy!” “Great.”, I thought. I was hoping for a bit more secluded campground, but we were so tired we didn’t care.
We cycled back to town, bought some beer and delicatessen food, went back to camp, ate, and fell asleep.
The next day, we planned to drink beer and just relax. We cycled to town, ate at a small restaurant, leisurely cycled around the scenic, old fashioned town, then picked up more food and beer at the local grocery store and cycled back to camp. We then proceeded to drink and jovially talk while sitting in front of our tent. That afternoon, low lying clouds began to crawl over the tops of the nearby mountains and it began to look like a real Memorial Day weekend. In southeast Idaho, it rains without fail every Memorial Day weekend. The next thing I knew, tlp and I were sitting in the tent eating our lunch while rain hammered the tent hard. Puddles began forming in the tent from the water dribbling in from the seams while I took refuge on my inflated air mattress and tlp soaked the invading water up with a towel. We were both pretty drunk so we laughed, ate some more and enjoyed the excitement.
 After the rain stopped, we surfaced from our tent. At this point, I had consumed quite a bit of alcohol, so I stumbled over to the neighbors camp with a couple of beers and began chatting with a guy who was about 20 years old or so. Tlp joined us with his beer and soon we were chatting up a storm. The guy we were chatting with was drinking from a bottle of Jagermeister and he offered me a drink of it. After this, everything about this particular evening gets a little fuzzy. But I do remember being half asleep in my sleeping bag in the tent, then quickly unzipping the tent door and tossing my cookies. Note to self: stay away from the damned Jagermeister. It is deceivingly tasty! Oh, and to the right you can see an amazing discovery of mine: the bicycle wheel beer holder! ;-) After the rain stopped, we surfaced from our tent. At this point, I had consumed quite a bit of alcohol, so I stumbled over to the neighbors camp with a couple of beers and began chatting with a guy who was about 20 years old or so. Tlp joined us with his beer and soon we were chatting up a storm. The guy we were chatting with was drinking from a bottle of Jagermeister and he offered me a drink of it. After this, everything about this particular evening gets a little fuzzy. But I do remember being half asleep in my sleeping bag in the tent, then quickly unzipping the tent door and tossing my cookies. Note to self: stay away from the damned Jagermeister. It is deceivingly tasty! Oh, and to the right you can see an amazing discovery of mine: the bicycle wheel beer holder! ;-)
The next morning, I got up, stepped outside, noticed my pile of puke, and went to the port-a-potty. I came back and tlp didn’t look very happy. He was complaining that I snored a lot last night, and he looked tired and expressionless. I think we both just wanted to go home and recuperate from this expedition.
After I ate some leftover bread and cheese, we took down the tent, packed up, and started our journey back home at about 9 am. Our spirits picked up as we cycled on up Dempsey Creek. This part of the journey was very steep and felt about like 14% grade or so in some areas. This was the reason why the trip down this side of the path was done at such break-neck speeds. After grinding slowly up the steep road, it turned to the oiled gravel surface, and soon we reached the apex. This direction was much easier than the other way since the climbing section is first, whereas in the opposite direction it requires a 40 mile ride to Arimo before the climb. Next, we rode the awesome, but chilly, decent towards Arimo in the distance. Pedaling home on the flat Highway 91 was easy and refreshing, and we made it home around 2:00 pm.
If you would like to read tlp’s version of this story, see his article!
Update, July 9, 2009 – Travis Poppe, my cycling partner and the Webmaster at Blue Ribbon Coalition submitted a story about this ride and we got published!

|
|