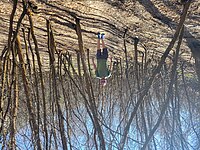
My long time hiking buddy invited me for a jaunt around the City Creek area on Sunday, April 3rd, which also happened to be my birthday. I’d been pretty dang sedentary for the last 2 years due to working from home, so I jumped at the chance to get off my butt.
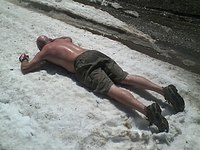
The temperature was about 55 – 60 F, the wind was calm, the sun was out: perfect weather. I was really huffing and puffing on the first hill climb but eventually got into the rhythm of the hike and felt better. Yeah, I am pretty dang out of shape (be sure to go to the gallery and look at that one horrifying image of my gut!). My buddy was doing better than I was due to him actually being active in recent years. Ah, well, I’ll get back into some sort of routine. I promise. Really.
We saw some deer and moose droppings, a few mountain bikers, and some big patches of snow in the higher elevations. Felt really good to be out in the wilderness again.
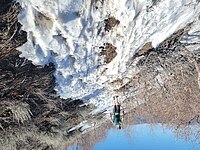
Slippery slush and snow. Ugh!
About halfway through the hike, just as my legs were starting to feel very well worked and slightly wobbly, we encountered a snow covered section of the single-track trail we were on. Not too big of an issue if the trail hadn’t been sort of tilted and narrow on the side of a hill, but such is the nature of much of the single-track trails around these parts. I was kind of grabbing onto the hillside bushes in order to avoid skiing down the hill sideways while saying “ah shit ah shit,” much to my buddy’s amusement.
Anyway, this hike was the longest 6.8 miles I remember in recent years, measured by how my legs felt during the last mile. We completed it in about 2 hours and 45 minutes. I was really glad to go home, but super glad I’d gotten outside and had some adventure. My resolve to hike, run, and bike more in coming weeks is renewed!
I’m finally getting around to writing short summaries of 4 great adventures I got to experience last fall! I took quite a few photos of it all and organized them all chronologically in this gallery. Enjoy!
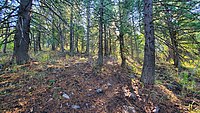
Scout Mountain Hike, September 20, 2020
A friend and I decided to hike to the top of Scout Mountain since we’d never done it before. We knew it was about 12 miles out-and-back, so we started hiking around 8 am. It was pretty cold, the air was moist and chilly, the trail was damp, we were surrounded by trees and foliage, and we had to walk around puddles occasionally. Finally made it to the “frog pond” (thought it wasn’t THAT far from the trailhead, but it is!), and then we marched on until the trees began to appear gradually more sparse. Eventually, the terrain took on the “classic Idaho look” which is dry, grassy-with-sagebrush, with pine forest and junipers sprinkled around. We followed the road, waved to some off-road motorcyclists, and paused to take in the beautiful thick pine forest on the east side of the ridge. After a snack, we hiked on and soon saw the top of the peak with radio towers. We spent some time at the top taking a look at the variety of amazing scenes and terrain that can be seen in different directions. The hike back down was nice, said hello to a few folks, and by the time we were nearing the parking lot, we were both hobbling a bit. But it was the good kind of pain!
Bonneville Peak Hike, October 3, 2020
Our next adventure would be scaling Bonneville Peak (didn’t quite make it to the top due to this hike being rigorous to say the least), also known as Pebble Creek Ski Area. The hike began steeply and was just pretty dang steep the entire way. If you like vertical hiking, this one’s for you! It’s one of those hikes where you have to shorten your stride, and pause every now and then to take in the scenery, but mainly just to catch your breath. This hike gave me a renewed awe of downhill skiers, especially since my hiking companion had skied the mountain many times and spoke about it as we hiked. It sounded terrifying given the grade, trees, boulders, obstacles, etc. After I shed a few layers of clothing, we came upon a bend in the trail, and this is when my friend said we ought to go left at a sign marked “Stacey’s” and follow a game trail, which was a bit tricky due to the sideways leaning grade, scanty trail, and crossing over fallen trees. At the end of that trail began the “out of bounds” area of the ski area, which ascended steeply to the ridge. It was one of those hiking sections where you can see the ridge every time you look up, but you just keep climbing and you wonder if you’ll ever make it to the unreachable ridge. It was very vertical to the point of having to sort of zig-zag your way up while being fairly nervous about accidentally taking a tumble down the mountain. My legs were getting shaky, I was getting pretty dang tired, but eventually we made it to the ridge and sat down on some big rocks for a snack. After resting, we gingerly descended the steep out of bounds area, and I was very glad to be back on the game trail and then back to something that resembled an actual trail.
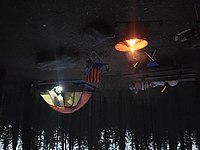
Island Park Camping, October 3 – 5, 2020
After getting home from Bonneville, another friend of mine was like “k, time to go Island Park camping, you ready?” and I was like “OH LAWD HAMMERCY.” But of course I agreed, and soon we were all packed up and driving north. This turned out to be a relaxing and badly needed vacation for both of us. We set up camp at the Riverside campground, which was free since it was so late in the year. Drinking beer around the campfire, making meals with a Jetboil and self-heating meals, walking down to Henry’s Fork; it was beautiful and relaxing. The next couple of days we did some sight-seeing at Mesa Falls, Big Springs, and did some lazy wandering around the town of West Yellowstone. Oh, and breakfast and a bloody Mary at Angler’s Lodge to top it all off. Perfection.
City Creek Hike, October 18, 2020
If you are looking for a broad variety of scenery and terrain, this is the 12 mile hike for you! Glad my friend was with me for this hike, since he knows the area much better than I. We parked at the City Creek parking lot at the top of Lincoln Ave., and started walking along the main road. Then my friend led us off on a trail to the right, then off into the forest on a trail to the left (I believe this is called “The Grove.”) This area is a magical place with aspen trees, colorful leaves decorating the forest floor, and I was expecting to see fairies and unicorns. That trail eventually led back to a broader trail, which then led out into the open and then to a dark, pine forest. At this point I felt like I was a lost hobbit, but then I recognized the pathways up to Kinport Peak after exiting the forested area. After ascending a bit towards Kinport my friend suggested we take a detour towards a trail that led down a ravine, but I insisted we follow a wider trail up to Kinport that looked more well-used. I probably should have followed my friend’s advice especially since he knew how long and steep the trail was that I was suggesting. The winds that day in town were around 20 mph, but up on that west-facing ridge trail, the wind was insane. The gusts felt about 50 mph and nearly knocked us off the trail a couple times. Pretty crazy feeling to be walking along a ridge, getting exhausted, on a dirt trail with no cover with wind slamming you from the right. My friend, at one point, sat down and said “wow, I’m so done.” After trudging along, he recognized a game trail that led around the south side of Kinport, which then led back to the main Kinport trail leading home, which was a very welcome sight at that point. We then hiked down the section known as Upper City Creek Trail, which I am not sure if I’ve ever hiked, or at least not for many years. After hiking down a rocky gut, we entered into a beautiful place of aspens and ferns, with the creek trickling near the trail. It was at this point that my friend caught his second wind and was feeling great, while my legs were beginning to feel like I needed a wheelchair. I was so glad to see the parking lot! But wow, I want to do that hike again! Maybe minus the barren, windy, steep-ass ridge from hell. :-D
I’ve been an almost daily bicycle commuter in Pocatello, Idaho since 2007. I’m writing this article to briefly point out my experiences cycling on the streets of Pocatello, and to also give a few tips on some commonly occurring points of minor, and easily avoidable, contention I’ve experienced coexisting with motorized vehicles. I’ll be just going over some basics and some gotchas I’ve personally encountered. However, all beginning cyclists should read the bible of bicycle commuting: Bicycling Street Smarts. Disclaimer: I’m no expert or authority on traffic law nor cycling technique; rather, I’m just bringing out a few points from my personal experience as a bicycle commuter.
So, How Is Cycling In Pocatello?
I think Pocatello is a lovely place for cycling. The weather is far milder than many other locations around the United States, which makes cycling easy here. We don’t get much precipitation thanks to the semi-arid climate, and that also makes for mostly mild winters. With proper clothing and bicycle components (like fenders for wet days and studded tires for winter), daily cycling is almost always feasible. I would say the only possible hardships to Pocatello cycling are the steep hillclimbs. Pocatello is nestled in a deep valley, so if you’re trying to get up on one of the “walls” of the valley, you’re in for a bit of a workout. Hit your low gear and relax. You’ll be fine.
The population is right around 50,000 people, so traffic isn’t very thick. When rush hour is happening, there are plenty of residential streets to get you where you want to go safely. And the folks are very friendly here. Oftentimes, motorists are actually too courteous. They’ll do things like stop for a cyclist when the cyclist is at a stop sign at an intersection and they don’t have a stop sign. Always gives me a smile, a chuckle, and a mental facepalm. ;-)
Idaho bicycle traffic laws are also looser than in any other state! You may treat stop signs as yield signs, and red lights as stop signs. This is called the Idaho Stop.
I’ve cycled in St. George, Utah (hotter than hell) and Roanoke, Virginia (thick traffic and NASCAR-crazy motorists), so I have had an opportunity to compare and appreciate my home town’s climate and people.
The Most Commonly Occurring Gotchas And Awkward Situations
I should put one of these on the back of my cycling jacket.
Now it’s time for me to get on my soap box and talk a bit about some awkward situations that I personally encounter somewhat frequently. With practice, these awkward situations can be handled with ease and finesse, though, so they really aren’t that big of a deal. Again, your experiences may be different and you are highly encouraged to read Bicycling Street Smarts, and then get out on the road and develop your own techniques.
So, bicycles are in the same category as slow moving traffic, such as tractors, and they are to conduct themselves in pretty much the same manner. If you read all the material you can find about how to cycle in traffic, it all boils down to this: follow regular traffic laws (just like any other vehicle), and allow faster traffic to pass you when it is safe to do so. Pretty simple. Additional tips to remember are:
Plan your route ahead of time. Map out your route utilizing low traffic streets, such as residential streets. I used to cycle on the Jefferson Ave. as part of my commute, which has very little shoulder, is 30 mph, and loaded with traffic most of the time. I don’t do that anymore. I stopped stressing myself out and frustrating motorists. There are plenty of side streets to select from that will get you almost anywhere you want to go. ;-)
Don’t use the sidewalk unless you’re planning on going at a very, very slow pedestrian-like speed. People backing out of driveways, or trying to pull out from an intersecting street are not looking for something going 10 mph or faster on a sidewalk. I ran into a truck that way once upon a time! Not cool.
I prefer using lane-position language as opposed to hand signals. This way my hands are always on the handlebars, which is where I like them. If you’re planning on making a right turn, cycle to the far right side of the line, and vice versa for left turns. If you going straight, be in the middle of the lane. Being in the middle or the left side of a lane may feel funny for new cyclists, but you’ll get used to it. Some motorists may be grumpy that a cyclist is using the road, but they will at least understand what you’re doing and where you intend to go.
Cycling on the road is straightforward and easier than most people think. But here’s my list of potentially awkward situations.
1. The motorist sitting at a stop sign on the left.
So, you’re cycling down a calm, residential street, and you’re approaching an intersection. You have no stop sign, so you’re pedaling at normal speed. If there’s a motorist waiting at a stop sign on the right-hand street at the intersection, they can see you very plainly right through their driver side window. As you get closer to the intersection, you’re practically eyeball-to-eyeball with them. They notice you and they’ll wait patiently for you to get through the intersection before proceeding. But the eyeballs of the motorist sitting at the stop sign on the left-hand street of the intersection is a bit farther away, and their vision may be partially blocked by a window pillar. About 20% of the time, they’ll attempt to proceed out into the intersection, see you, stop, smile, wave, and mouth “oops!” to you. And then sometimes they won’t even see you at all until they’re all the way into the intersection. Anyway, just be a little more cautious than usual when someone’s on the left street of the intersection you’re passing through. :-)
2. Approaching a stop sign or stop light with nearby motorists.
Here’s another semi-challenging situation: cars and bikes all sort of slowing down and crowding to a stop sign or stop light at the same time in close proximity. The main idea is to keep everyone in a nice, neat, single-file line. Here’s the rules I follow for this:
When in doubt, just slow down while way over on the shoulder (to make it very obvious that you’re letting the driver behind you pass), wait for the car to pass, and then merge in directly behind the car in front of you so that some other car doesn’t pull up, getting you stuck you on the shoulder. It is better to err on the side of “you first” and being patient than attempting to floor it to get in front of a car, then slamming on your brakes before the intersection. ;-)
Avoid turning 1 lane into 2 by pulling up to the right of a car. There are times to be on the shoulder, but this isn’t one of them. Why? Because you don’t want them to try to do a right turn in front of you. If you are approaching a stop and you’re already in the lane, stay to the middle or even the left of the lane. This leaves all ambiguity out of the picture, and forces the motorist to stay behind you where they belong. Additionally, it gives them the option of pulling up to the right of you and making a safe right turn. If you are wanting the car behind you to trigger the red light to change, you can always pull up into the cross-walk so they can trigger it. This usually isn’t necessary since I can just proceed through the red light when traffic clears anyway.
If for some reason you’re cycling in the shoulder, and traffic is so thick that you can’t merge into it when coming up to a stop, then just stop on the shoulder. Be patient and wait for traffic to pass. This usually shouldn’t happen because you should be cycling on a low-traffic street, or in line on a slow moving, high-traffic street (like Main St. or Arthur Ave.). What should you do on a high-speed, high traffic street? Avoid them unless absolutely necessary, of course! Unless there’s a big, fat comfy shoulder to cycle on (like Garrett Way).
So there you have it. Those are a few tips that I have personally given some thought to and found useful in my daily commute. Feel free to comment with questions, corrections, complaints, or other cycling issues you’d like to point out! Happy cycling, everyone!
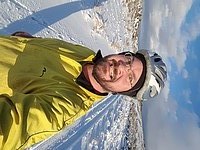
Quite a bit of snow fell last night. I witnessed this blizzard as I looked out the window occasionally from around 2 am to 4 am. I was doing some system maintenance for my job while eating a really late night dinner. I had the next day off, which made it worth it. Mostly.
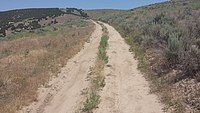
Today, about 4 pm, I headed out for a nearby trail to see how my fat bike handled. Or, rather, if I could handle the trail. I headed out on E. Cedar St. trail, alternating my riding between thick snow and some vehicle tire tracks. It was pretty nice until the snow got a bit deeper, the grade got a bit steeper, and the vehicle tracks ended. Then I started just spinning out a lot. I’m going to give it another shot in a few days after dropping my tire pressure a bit and I’ll see if that makes a difference on the steep-and-deep stuff.
I’m writing about an event that happened like a year and a half ago (May 3, 2014 to be exact). Because I’m that lazy about updating my blog sometimes. Dan and Jeff, feel free to correct me about some of these statements since your memory might be better than mine. :-)
So, Spring had sprung, and my cycling buddies and I began planning for some cycle camping. We wanted to do something a little more adventurous than our past cycle camps, and we identified Chesterfield, Idaho as fairly close enough to Pocatello to be our next logical step in our ascendance to becoming Real Cycle Campers[tm]. Chesterfield features a large reservoir popular with local fishing enthusiasts, and it also has bathrooms which is nice. But no nearby running water that we knew of.
For this adventure, we would need some extra things that we don’t normally bring: dehydrated meals, camp stoves for boiling water, extra tools and repair supplies, mosquito / tick repellent, bear spray, a small bottle of vodka (can’t haul beer that far, you know), and a pump-style water filter supplied by Dan.
I overheated. :-/
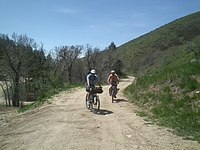
The route we planned on taking would require mountain bikes since half of it would be on trails. We cycled to Inkom, and then took Inman Road, cycled over Inman Pass, and then down the long, long trail to Chesterfield Reservoir. By the time I got to the top of Inman Pass, I was hot, exhausted, and laid down in a large patch of snow I found at the top, which felt spectacularly good. On the other side of the mountain range, we had to cross a few large patches of ice and snow, but the trails were very ride-able for the most part. The ride between the pass and the reservoir is only 15 miles, but seemed endless to me.
After about 5 or 6 hours total riding time, we finally arrived, sat down for a bit, relaxed, and tried calling / texting family and friends to let them know we made it. I remember my companions wondering who’s bike + equipment was the heaviest. I won that contest. I later weighed it and found that it came out to around 65 lbs, hehe. Yeah, I need to swap a few things out for lighter alternatives.
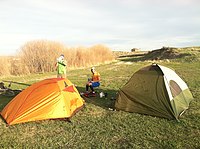
The campsite
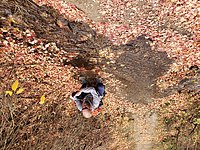
We found a nice, grassy spot to set up camp, and we began pitching tents and looking for a good place to find water to filter. We found a nearby stream that flowed into the reservoir and took turns filtering that into Platypus water bags. This work pretty well after we got the hang of it. I drank most of the vodka, which improved my mood a lot (I was feeling tired and crabby). We fired up Dan’s little propane stove, boiled water and added it to our dehydrated dinners which taste absolutely fantastic when you’re starving after a long ride.
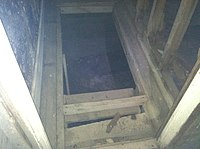
*Queue spooky music*
We decided to take a walk around that evening to explore a little. We found a old, spooky, abandoned house that appeared to have built by settlers over a hundred years ago, at least. According to Wikipedia, Chesterfield, Idaho is a ghost town founded in 1881. Nice.
In the morning, we felt pretty rested, and dreaded the long ascent back up Inman Pass with our sore legs and knees. But the journey back was pretty nice and enjoyable, especially since the east side of the range is a lot more gradual than the steep west side. And, of course, the descent down the other side was a lot of fun. We visited a friend of Jeff’s on the way back through Inkom, and then made our way back to Pocatello. It was a very successful cycle camp, I think. Except I think I will invest in a gravity-style water filter for our next no-running-water camp site. Pumping Dan’s water filter was rather time consuming. But we would have died without it, though. So thanks, Dan. ;-)
After Pocatello enters the 3 month hotter-than-hell season, it is important to get started on your bike ride as early in the day as possible. However, sometimes this just doesn’t happen either because of scheduling conflicts, or you’re just lazy and want to sleep in on Sunday. It was a bit of both for me on Sunday, June 28 which had a high temperature of 101 F.
No worries! Just load up with 3 to 4 liters of water (some to drink, some to squirt on yourself) and head out at noon! Yeehaw! That’s what I did. I took my time, took breaks, drank a lot of water, and had fun. My objective was to cycle around on the trail that starts on the corner of American Road and Buckskin Road, and do a little exploring. It kind of reminded me of one of those Australian outback nature shows, where you can see waves of heat in the distance and lizards scurrying.
Pocatello is in a semi-arid desert region
So, yeah, got a fairly good 1 hour workout. Said hi to a trail runner who exclaimed that he was surprised to see anyone out besides himself in the intense heat. I offered him some water, but he said he was fine.
One interesting thing I re-discovered was the basic rule of not touching your front brake when you happen to be downhilling on loose terrain. The above mentioned trail has sections of powdery dirt that has been beaten into the consistency of sand or snow, and “feels” quite similar in traction terms. While coming downhill, I was using mostly rear brake and a bit of front brake, and as soon as my front tire hit the deep, loose soil it performed the cha-cha. Yeah, rear brake only on the sketchy sections. Just leave your front brake alone. :-)
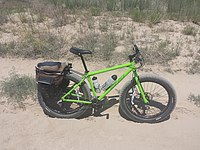
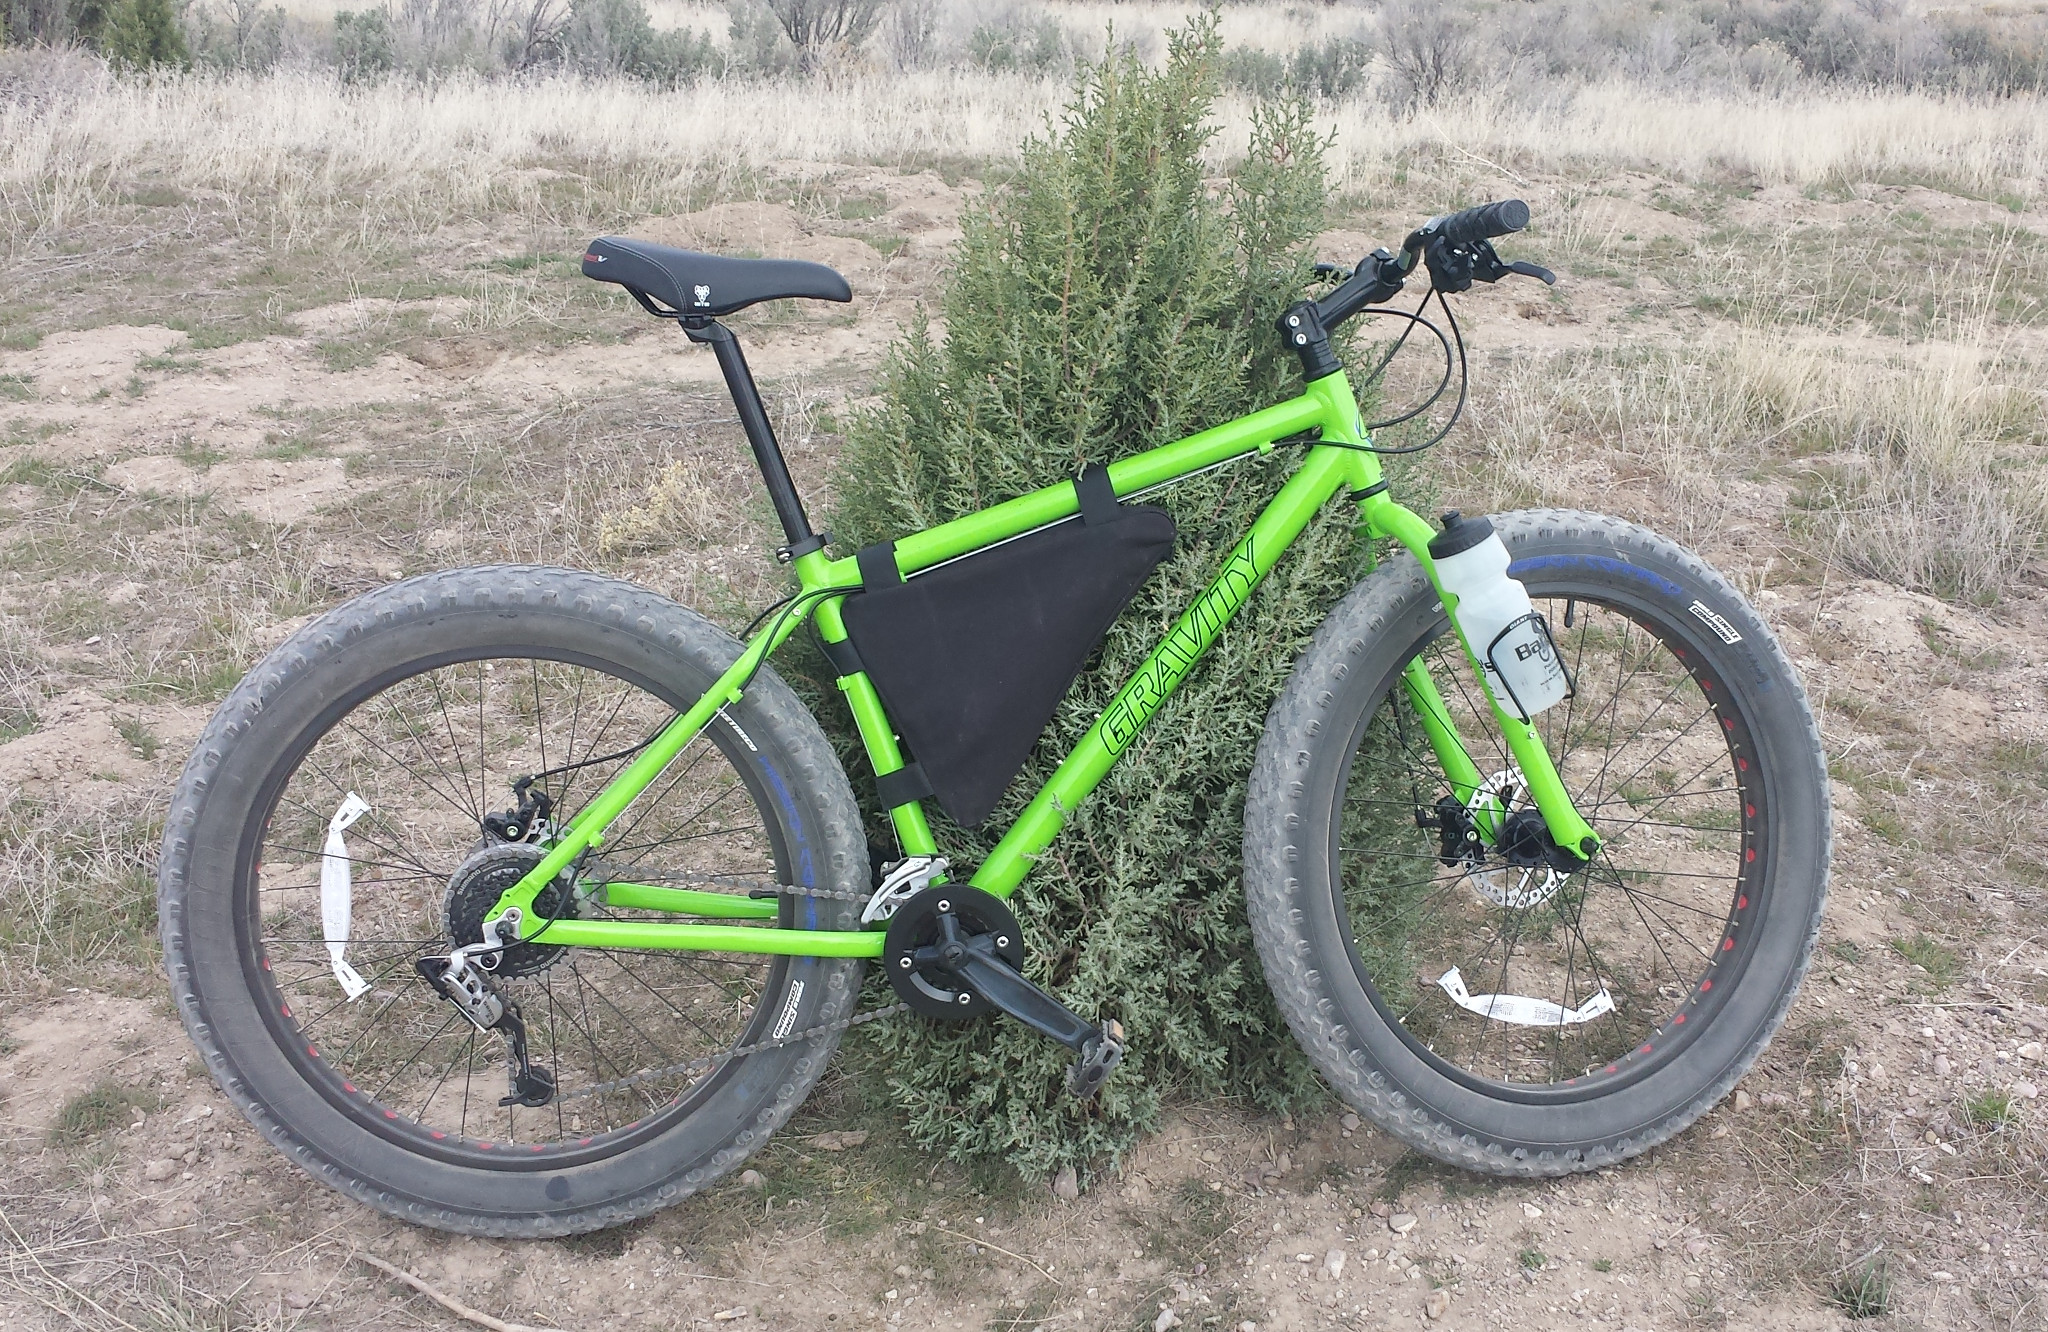
So, in case you haven’t heard, a few days ago I purchased a new Gravity Bullseye Monster (yeesh, that name is heinous) from Bikesdirect.com, which makes my sixth purchase from that company. They just keep sucking me back in with their great deals and fairly high quality products. I can’t complain.
As you’ve seen from a previous article of mine, my friend Jeff allowed me to test out his fat bike in the winter, and I was extremely impressed with their sure-footed-ness. Four inches of tire compared to the regular 2 inches you find on most mountain bikes makes quite a bit of traction difference. So, I had to have one to add to my fleet of bicycles.
Today, I woke up, had some breakfast, and set out for Nasty Hill to see what I could do with my new fat bike. Cycling out felt very nice, very mountain-bike like, except more so (interpret that however you will). ;-) And then came Nasty Hill. I tried, I spun on on the loose rocks, I failed. I hiked-a-bike to the top and decided to try decreasing my tire pressure. The Vee Rubber tires that come with this bike are marked as 8 – 22 psi, and I set out today with about 16 psi. So I decreased down to 12 psi using my handy-dandy tire pressure gauge that I bought from Autozone. It’s one of those Slime brand, low pressure, internal-needle style gauges you can get for $5.99. I think they’re more accurate than the ones that look like a ball-point pen, and using them to deflate accurately is a breeze. Anyways, so I attempted to ascend Nasty Hill again, avoiding the loose rubble, and made it. Twice! I then attempted attacking the loose rubble section again, and spun out and failed. Well, there ya go. Low pressure plus avoiding the loose stuff on steep grades equals success.
After heading back home, and doing a high speed descent on the asphalt road, I felt the gyroscope effect with the heavy tires / wheels on the turns which felt a little funny (Edit: after googling around for the cause of this odd issue, it was found that the tire type is most likely the cause of this “self steer” effect). All in all, this is a mountain bike that gives tons of extra traction and I really enjoyed myself. Next, I will be going on a longer trail ride with my buddies in the coming months. Stay tuned!
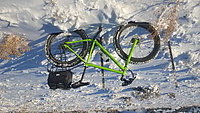
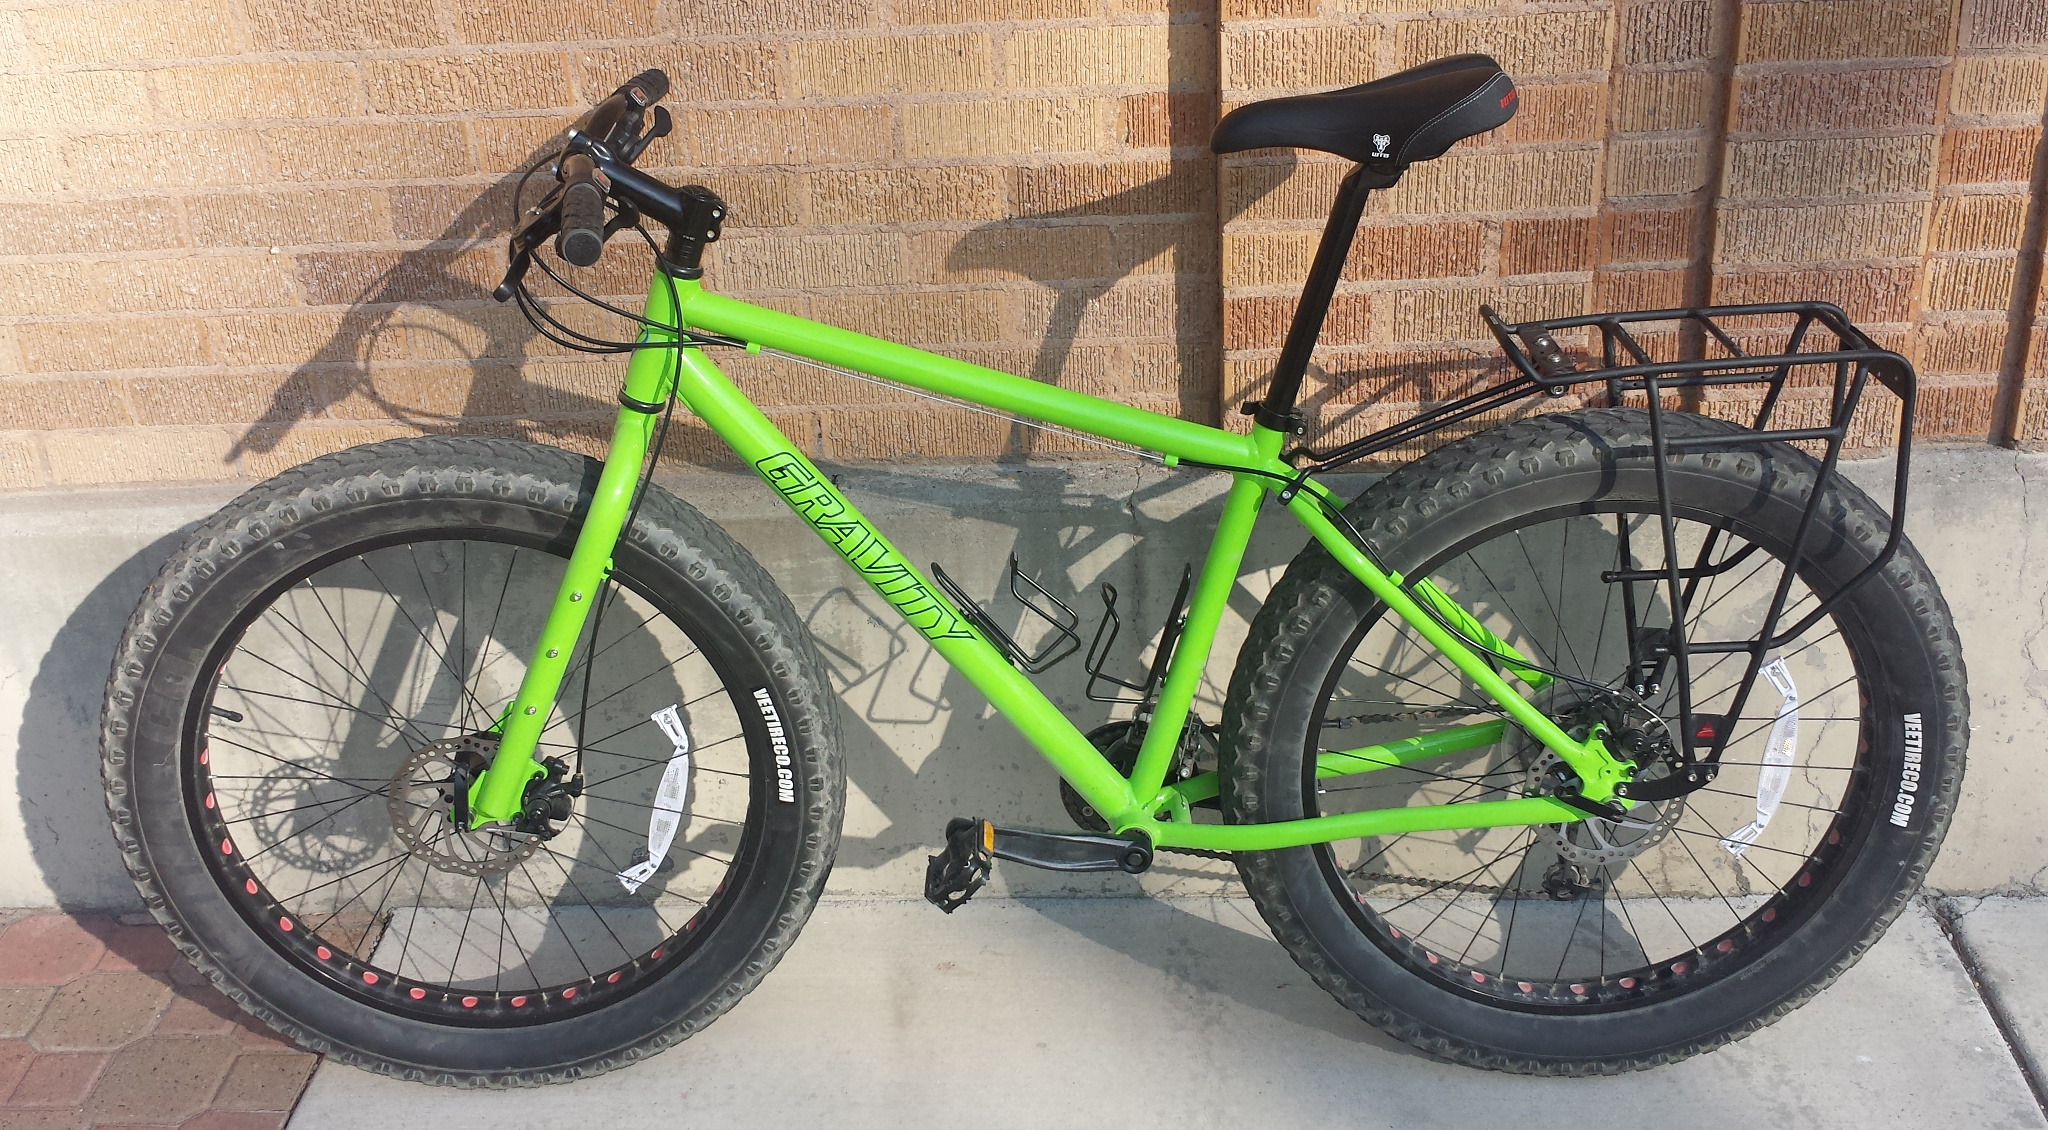
Fat bike with rear rack
Edit, April 22, 2015:
Ordered the following new items for this bike:
Mr. Tuffy 3XL, 4 inch wide tire liners ($44 … yike!)
Topeak Mountain Morph Pump ($28)
Kenda Fatbike Tube ($11.50)
Axiom Fatliner DLX rear rack ($56)
Installing the rear rack and tire liners was flawless and easy! I am now ready to do some longer trail rides without fear of punctures.
Edit, June 8, 2017:
Almost forgot to add that the winter of 2016/2017 in southeast Idaho had the heaviest snowfall in several decades. And this bicycle came in extremely handy for commuting to work. I have a regular mountain bike with studded tires that works well on the icy streets which are oh-so-common in Pocatello winters, but this particular winter’s streets had a variety of snow pack on them for a good share of the winter season. Many times I woke up in the morning to all kind of deep, fluffy, churned up snow, for which this bike does fantastically on. It’s amazing how much difference 2 extra inches of tire width makes, especially when you deflate them down to the point of being semi-soft.
Ten days ago, on Thanksgiving, I gave my 2 Hour Challenge Ride a good honest try. But, as I explained in that article, at around the 1 hour 20 minute mark I was starting to feel some fatigue. I neglected to mention in that article that along with my legs starting to feel fatigued, I was just plain ‘ol bonking. Not bonking hard, but that oh-so-familiar feeling of “I need to stop off somewhere and buy a triple cheeseburger” was setting in. Then, a few days later, I stumbled upon an article by Carmichael Training Systems that addressed sweating and how it relates to exercise. And here is the small part that gave me a sudden realization:
Electrolyte drinks or carbohydrate/electrolyte drinks should be a part of during-exercise nutrition strategy whenever your workouts are going to be longer than 1 hour. For workouts shorter than an hour, electrolyte drinks may still be somewhat helpful, but generally you’ll start short workouts with enough carbohydrates and electrolytes on board to complete a high-quality one-hour session. — Chris Carmichael, Founder/Head Coach of CTS
Wow, maybe this explains why I died at the 1 hour 20 minute mark. Ya think? :-) I had actually used Gatorade or Powerade in the past, but had stopped using it since most of my rides back then had a lot of breaks where I’d eat granola bars, peanut butter sandwiches, and so forth. I just felt like it didn’t need it.
So, sometime last week, I thought of a fun experiment. I was going to go buy some Gatorade powder, mix that into my water bottles, and drink that instead of my usual plain old water. Well, friends, it worked. I was totally expecting to start feeling like a weakling at the 1 hour 20 minute mark or so, and I didn’t. It might have been the turkey and cabbage wrap I ate this morning, it might have been the fact that I started cycling a few hours later in the day than last time. But, I dunno. I’m pretty sure it was the Gatorade. I felt pretty fabulous energy-wise all the way to the finish line. My legs were pretty fatigued, but I was able to power through it anyway since my stomach felt fine and I didn’t feel so horribly weak like I did on the previous attempt. I felt like I could go for another hour (haha, ok, maybe not…).
And my time? 2:04:15 with an average speed of 15.3 mph (taken from my cyclometer). Shaved off nearly 6 minutes AND I didn’t feel like I was going to fall over afterwards. Great success! </ Borat >
It seems like almost every year, Thanksgiving has perfect cycling / running / whatever weather. I think the universe is telling us to burn some calories before taking too many of them in. :-D This Thanksgiving, it was 50 degrees and sunny, so I decided to do my 2 Hour Challenge Ride! This is a name I made up for a very popular road route near Pocatello, which I wrote about in this article.
I hadn’t done as much cycling this year as I have in past years (life just seems to get busier as you go along, huh?) so I didn’t expect to set any personal records. I had tried this ride a few months earlier, and I couldn’t even finish it due to the hot temperature in combination with my wussiness. However, today was cool which gives a massive performance advantage so my time today shouldn’t be all that bad, I thought.
As a side note, I usually like to do these personal challenges by myself, as I’m sure many of you understand. Being able to think about how your cardio and legs are feeling, and the appropriate gear you ought to select based upon those feelings (oh, the pain), works a lot better if you concentrate without distractions. Okay, okay, sometimes riding with others can give you extra oomph and can help you to ride harder. But that’s for another article. :-)
The route is in a big loop with a big hill climb, followed by a long downhill, followed by rolling hills and flats sprinkled here and there. I usually tackle the mountain first while my legs are fresh, even though it never feels like I’m warmed up enough for it and I’m slower than beans. Also, I’m a heavy-weight, and hill climbing is my personal biggest challenge. It’s hard. Really hard. So, yeah, I was doing the granny gear up Buckskin Canyon. Yes, my road bike has a granny gear. Bite me. :-p
After the agony of that, I usually reach the top at around the 45 minute mark or so (starting from the Booth / Pocatello Creek Road intersection). And, oh, the joy of the downhill is the elixir of life after that. And, wow, is it a long and joyous downhill. Miles and miles of it. And I really like giving it hell on the downhill, using downhill momentum to accelerate up the occasional hill, getting into an aero position, and having a general blast.
I reached Inkom at about the 1 hr 20 minute mark and I thought, “Ugh… nope… 2 hour finish is not going to happen. It’s gonna be more like 2:30. I should have exercised more, not drank so much beer, blah blah blah.” Also, the onset of my-legs-are-starting-to-feel-toasted syndrome was setting in.
But then as I headed onto Portneuf Road on the other side of this circular route, I felt a small, steady tailwind pushing me from the southeast. Oh, glory, all may not be lost! And I was very grateful for it, for by the time I was nearing Pocatello, I was looking for my friendly Bannock Highway Sinclair to stop at and rest. But, as I neared it, I thought against it. Especially since the temperature and conditions were so amazingly fabulous. You can’t ask for any better conditions than 50 F and a tailwind. That seldom happens.
So I plugged on, talked myself through it, spun a lot in a lower gear, kept moving, and finally arrived at that glorious Benton / Main intersection. And then I wadded my mouth with granola bars and chugged water like mad. Felt pretty good after I got some sustenance. ‘Twasn’t a bad ride. According to my cyclometer, my time was 2:10:10, average speed was 14.7 mph, top speed was 39.8 mph, and distance was 31.8 miles. Whee!
This blog entry is a continuation of my personal mountain bicycling learning journey that I started recently. I am a road cyclist who is learning the art of mountain biking with a little help from my friends. :-)
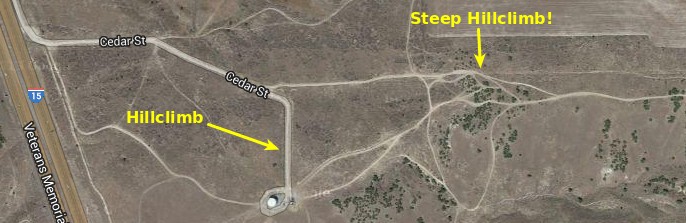
Last fall, Jeff Selfa was kind enough to take me, and some other mountain bikers who were looking to improve their skills, out to the East Cedar Street trail system to do a bit of practicing and to learn a thing or two. This turned out to be highly educational for me as I learned and practiced some important techniques pertaining to traversing steep, rocky grades. The trails in this area are pretty nice. They’re close to town and they’ve got quite a bit of variety: jeep style trails, deeply rutted trails with some crevasses, moderately steep stuff, very steep stuff, rocky sections, loose dirt sections, easy sections, etc. So it’s a great place to get out and try a few things.
There is one particularly steep hill section (marked as “Steep Hillclimb!” on the map to the left) that I affectionately refer to as Nasty Hill (or whatever other profane thing I feel like calling it at the moment) that is great for practicing steep hill-climbing and descending techniques. I was fairly familiar with these techniques, but Jeff and Nasty Hill emphasized them for me quite well. The most important of these techniques is to use your body to move the center of gravity backwards or forwards on the bike as necessary, and make this a lot more exaggerated on really steep hills. This means that you are hunching way up on your handlebars for steep hill-climbing. And your butt is hanging over the rear of your saddle for steep descents. Other than that, you just have to practice your balance, braking, pedaling, and practice a lot. I don’t know about all you other folks, but I require a lot of practice to get some of these techniques down pat. I’ve watched a ton of technique videos on YouTube, but I never really “get it” until I learn it for myself out on the trail and get some “muscle memory” put in place.
So, descending Nasty Hill isn’t too bad. I do it at a snail’s pace because I’m a wuss, but I can do it without any mishaps. Jeff and Dan Lloyd do it at a much faster rate. And they were also able to climb the hill without losing their balance. The rest of us, however, were not. Maintaining your center of gravity, balancing while moving slowly in your lowest gear, trying to maintain smooth-as-possible pedaling, trying to avoid loose stuff, and spinning out on loose stuff is difficult to do all at the same time. You’ll fall over unless you’re totally prepared for it. Having your center of gravity somewhere other than the soles of your feet is not a feeling humans are accustomed to. :-)
Over the next few months, I cycled back to Nasty Hill and kept trying. I was getting better, but still was not able to climb the hill without falling over.
But I am going to remember Sunday, March 23, 2014 as a day of great success. For it was on this day that I scaled the mighty Nasty Hill, not once, but thrice without losing my balance! Staying on the far right side of the trail away from the loose stuff, relaxing, and concentrating on good form was the keys to my success, I think. I am excited to go back and give some other areas of the section a try. I am also going to pick up my downhill speed a bit and see how I do with that. Yeehaw!
Bonus video! This is a video I shot of Jeff Selfa and Travis Poppe riding fat bikes on Nasty Hill in December 2013.